

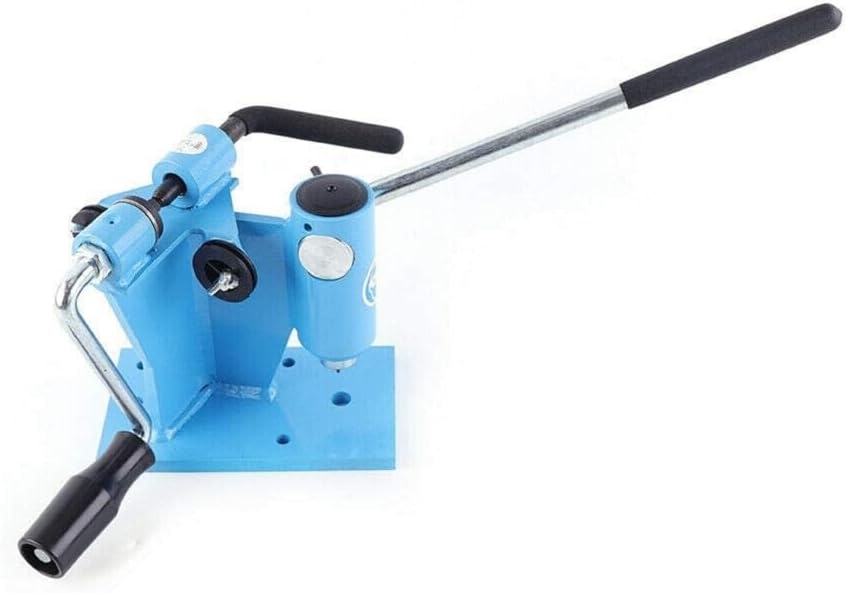
Bench Chain Breaker, Workbench Chainsaw Rivets, Chainsaw Link Removal Dismantle Repair Tool, Integrated Chain Saw Tool (US Stock)
Better Performance -- Chain breaker function safely breaks all chain rivets; built in thrust bearing and low fricti
-
Detail
Product Description
This is the latest chain-breaking, chain-integrated machine with a simple structure and a light overall design that meets the multiple functions of the repair chain.
*Safety Information
●To avoid possible injury to operator and/or bystanders, carefully read all instructions concerning
assembly, operation, and maintenance of this tool.
●Make certain that chain breaker has been mounted securely on flat, clean working surface.
Check mounting regularly.
●Check components on chain breaker regularly for wear and general condition.
●Always wear approved safety accessories for hands and face when using this tool.
Assembly Instructions
Chain breaker comes supplied already assembled excluding handle portion (1).See exploded view of product.
*BENCH MOUNTING
Step 1. Chain breaker is equipped with two holes for mounting. Lag screws or bolts (not supplied) may be
used to hold the unit in position. (llust, A)
●Mount chain breaker unit flush with side or front of bench area. (llust, A)
*RIGHT OR LEFT HAND USE
Chain breaker comes ready for right-handed use. If lft-handed use is preferred, follow the instuctions below.
Step 1. Unscrew set screw (3) and remove handle (1). (llust. B)
Step 2. Remove plastic cap (5). With screwdriver, depress spring-loaded punch holder (6) to free up cam
(2). (llust. C-D)
Step 3. Slide cam (2) out right side of chain breaker unit. (Ilust. E)
Step 4. Reinsert cam (2) into opposite side of chain breaker unit. Depress punch holder (6) and insert
cam. (llust. F)
Step 5. Replace plastic cap (5) and reinsert handle (1). Tighten set screw (3) with Allen wrench (4).
Step 6. Remove stop pin (10) from right side of unit and reinsert into left side. (llust. G)
-
Customer ReviewsNo comments